Setting up app to web checkout from your iOS paywalls
See how easy it is to offer Stripe checkout from your existing paywalls.
Get set up with web checkout
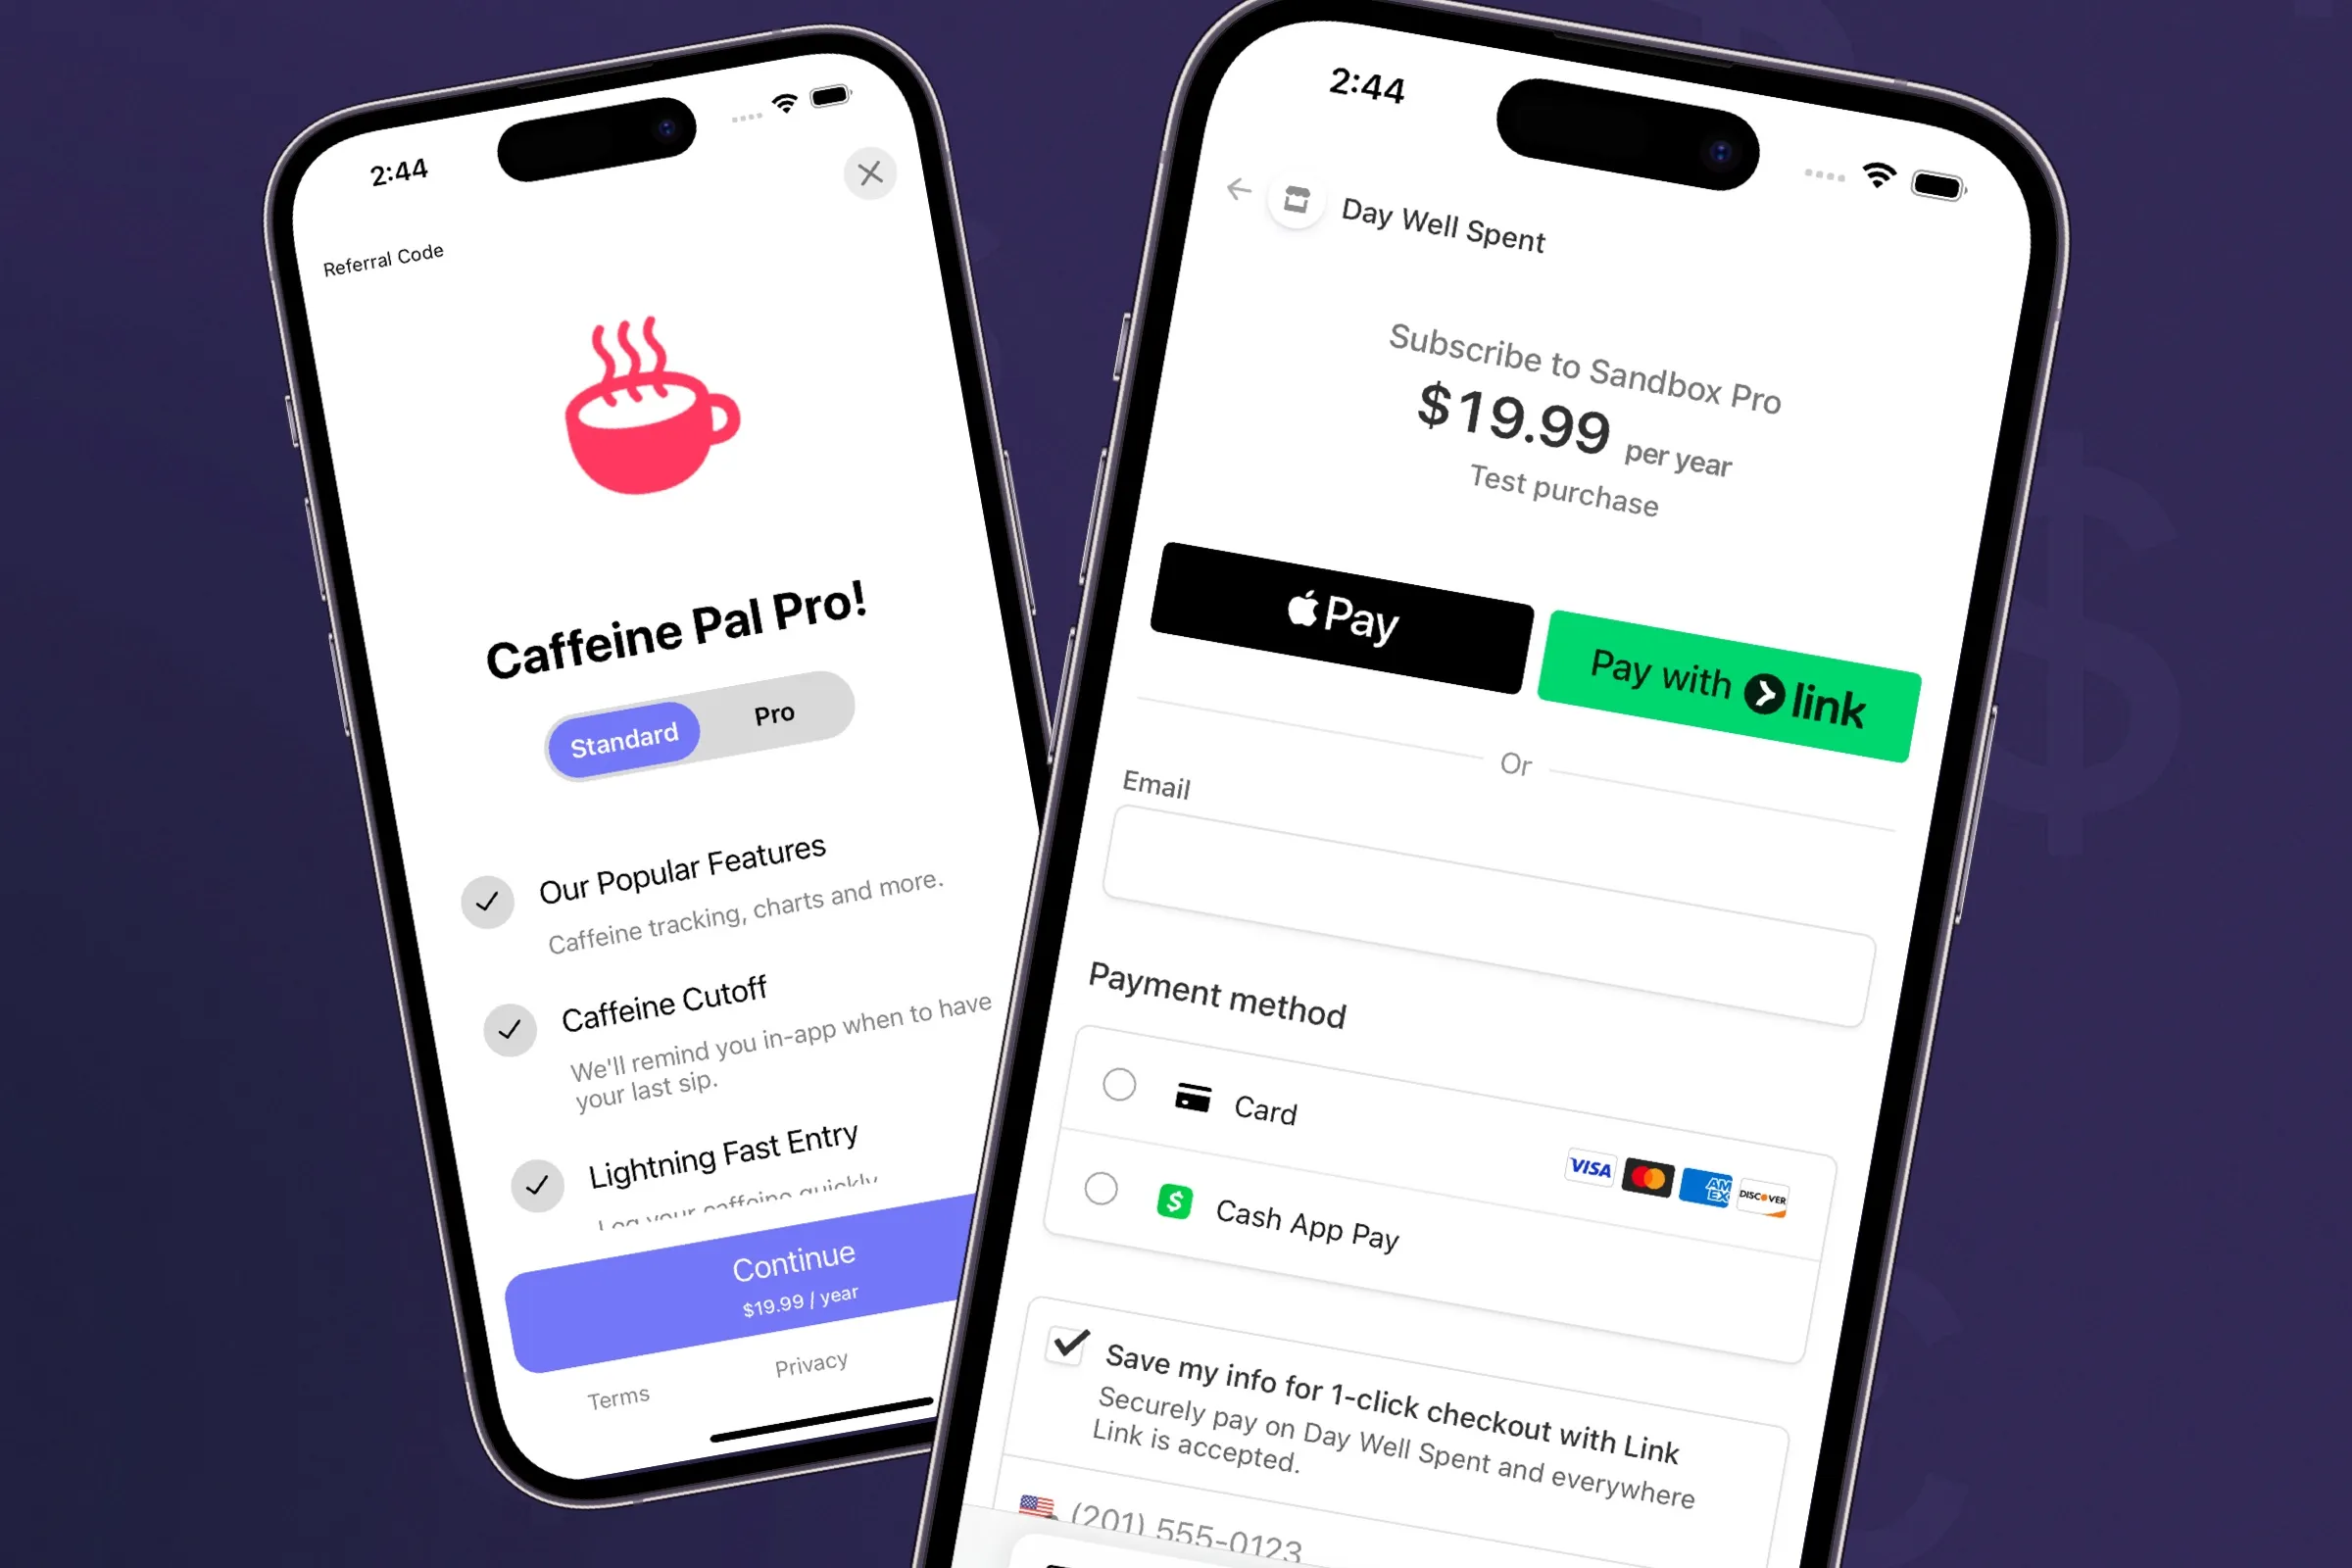
As the Apple versus Epic litigation reshapes the landscape, we recently announced that Stripe checkout for iOS apps is here. Web checkout enables app-to-web flows, plus an added benefit: you can present web paywalls to convert users on websites and through email campaigns using web checkout links.
There are three critical steps to complete for web checkout setup. Once you're done, you'll have a Stripe app accompanying your existing iOS app inside your Superwall project dashboard.
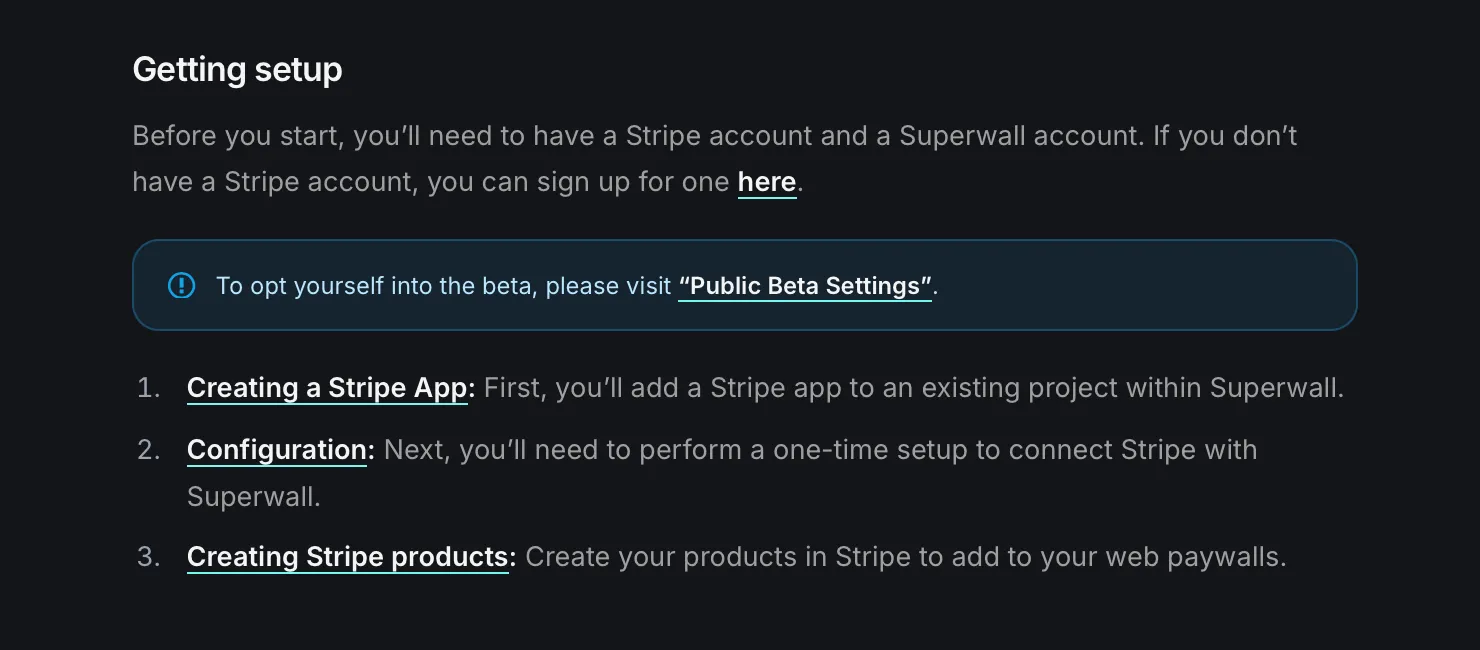
After following these steps, you'll have:
- Created a Stripe app in Superwall
- Configured it with your iOS app
- Created Stripe products to offer
Add a Stripe product to an iOS paywall
You can either use an existing iOS paywall or create a new one, then select a Stripe product from the product picker to add it.
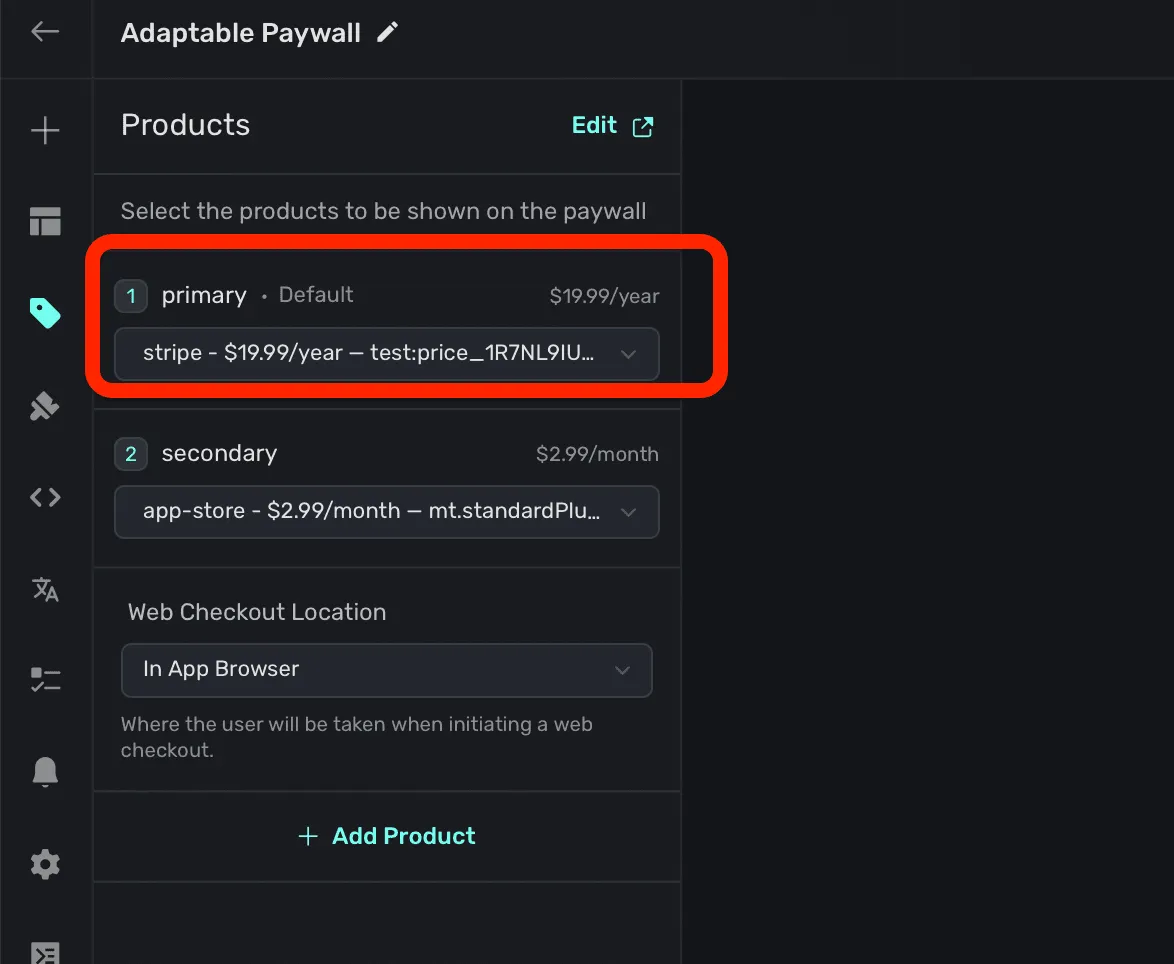
Telling the products apart is straightforward:
- App Store products are prepended with
app-store - Stripe products are prefixed with
stripe-
Sandbox products include test: after the price, while
production products display live:.

After selecting a product, you can choose one of two checkout flows via Web Checkout Location:
- In App Browser: Stripe checkout opens in Safari within the app, dismissing upon transaction completion.
- External: Stripe checkout opens Safari outside the app; upon completion, users return to the app (or immediately if universal links are configured).
Create a campaign for U.S. customers
Since the ruling applies only to United States customers, you can create a
campaign filter matching storeFrontCountryCode to
USA. We recommend starting with two paywalls: a traditional
in-app purchase paywall and an identical paywall using Stripe checkout.
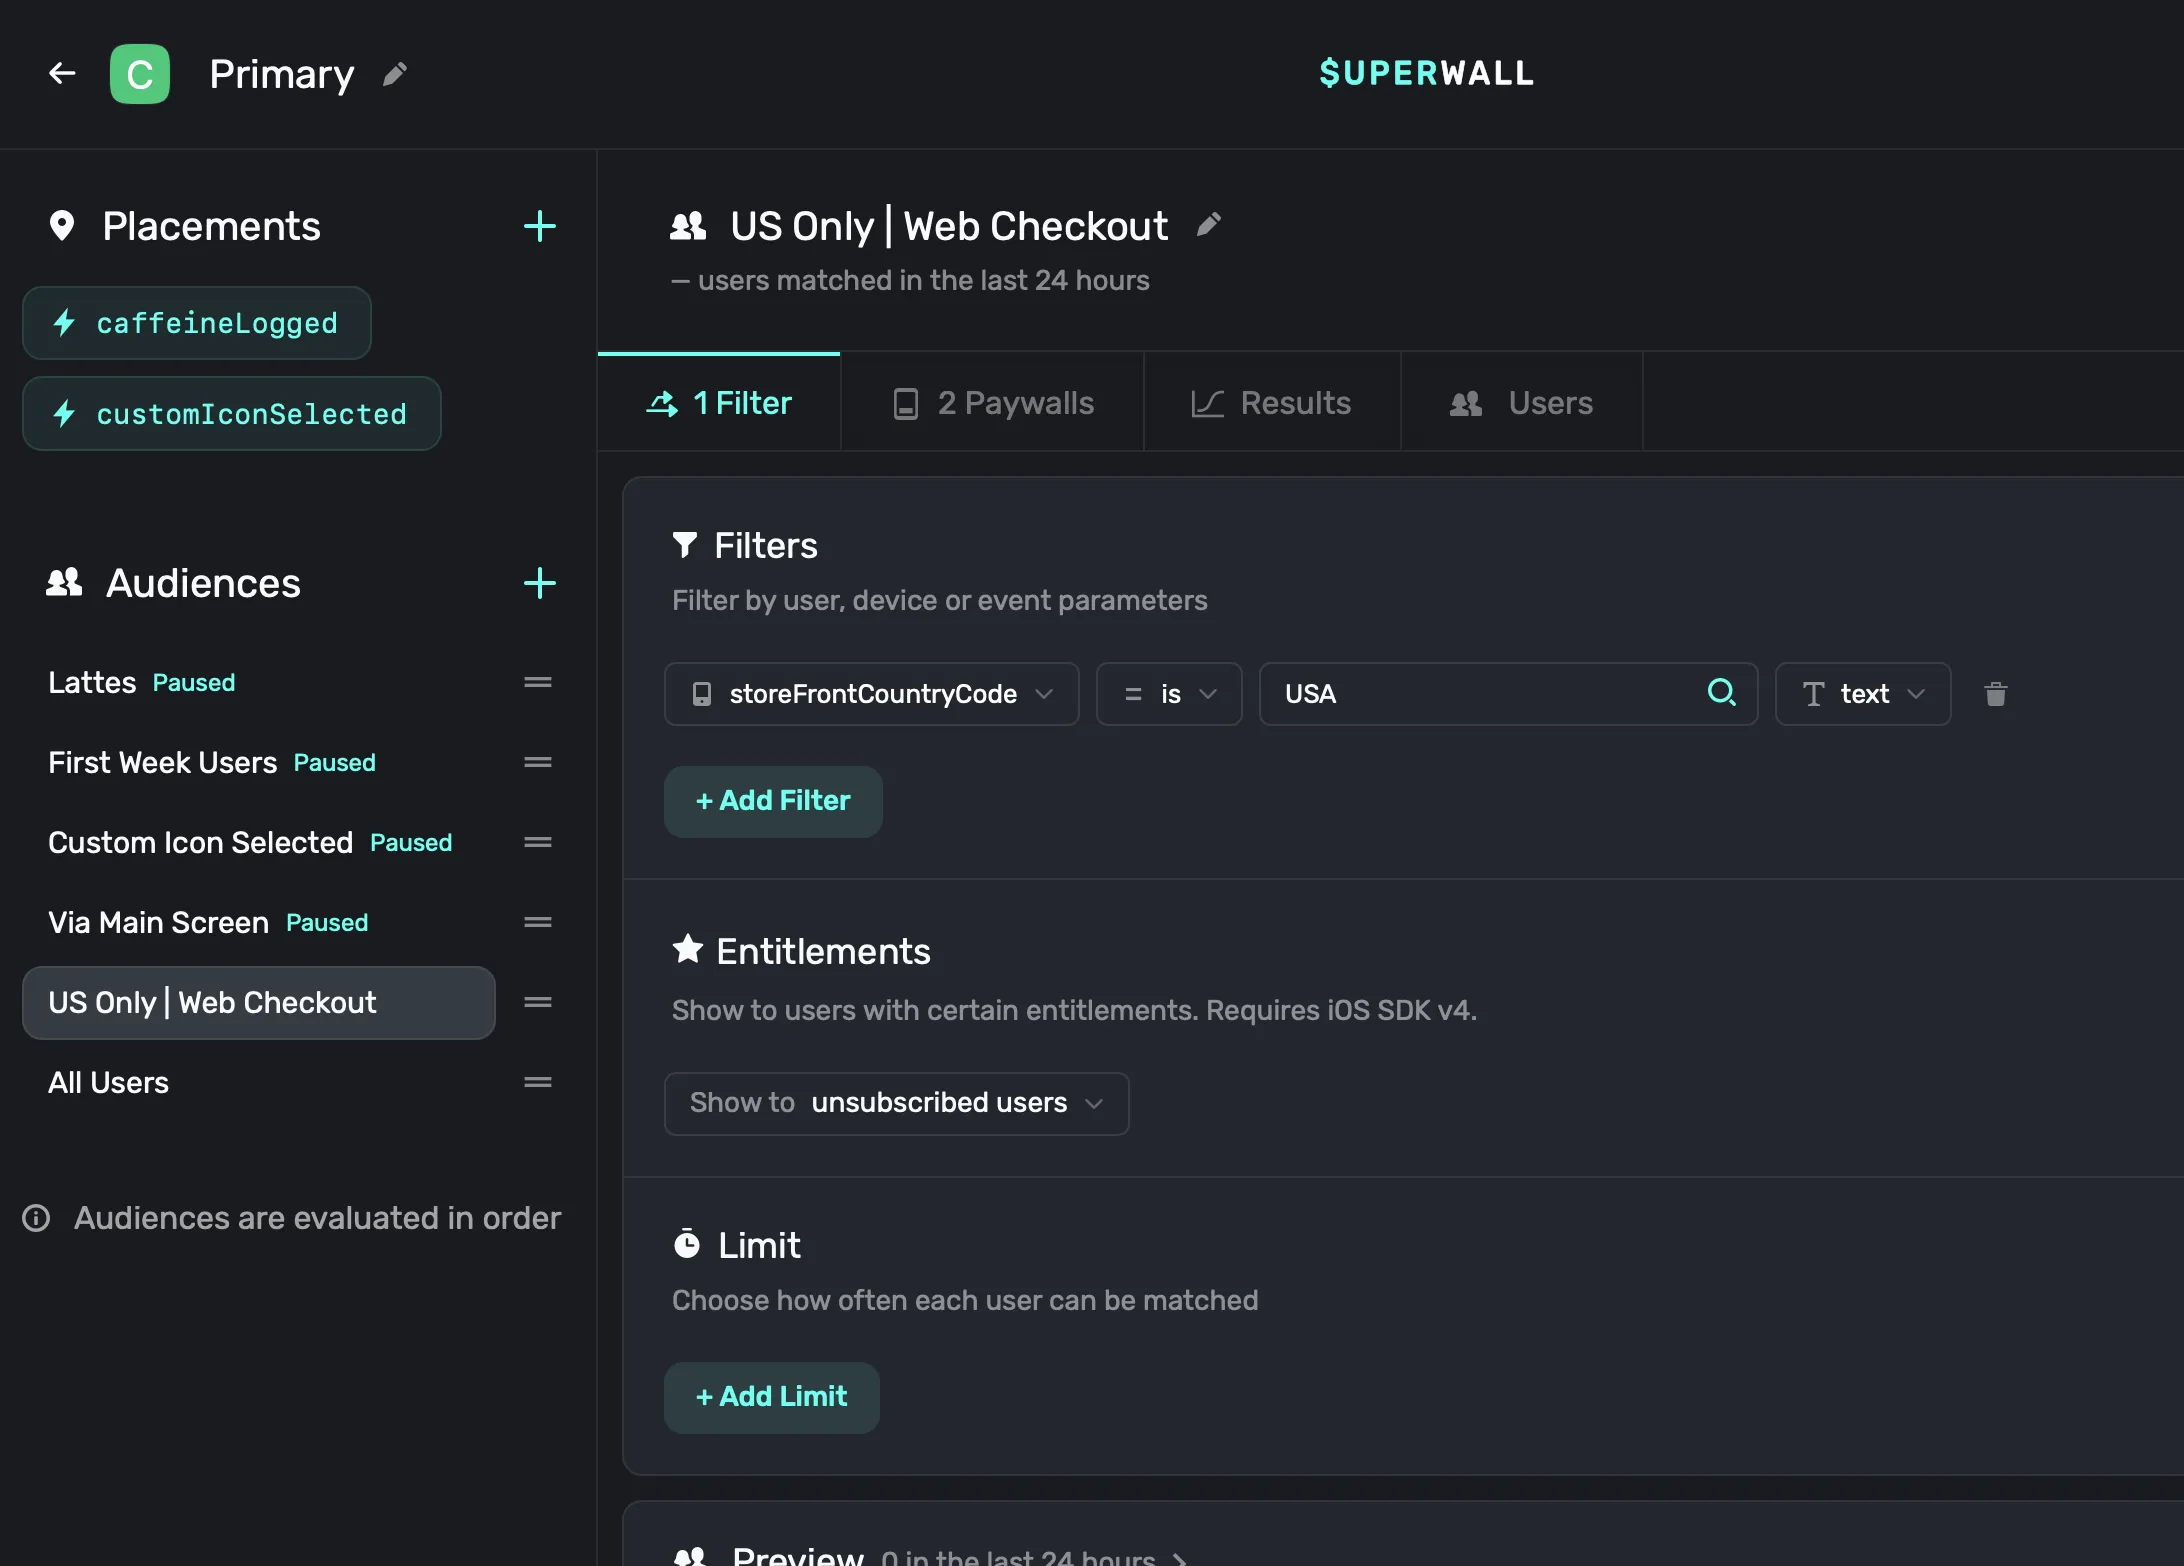
You can stack multiple audience filters, allowing fallback audiences. A filter with no restrictions acts as a "catch all," ensuring a paywall displays regardless of other filter matches.
Test it out
You'll need iOS SDK version 4.3.4 or above. After adding a sandbox product to an iOS paywall, testing involves running the app on a simulator or device.
Stripe's test card number is 4242 4242 4242 4242.
Upon completing a transaction in the iOS app:
-
The Superwall delegate invokes two functions,
willRedeemLinkanddidRedeemLink(result:), for interface updates. -
Superwall's entitlements update via the
subscriptionStatusDidChangedelegate method, marking users as paying customers.
Example implementation
@Observable
class SWDelegate: SuperwallDelegate {
    enum WebCheckoutStatus: Int, Identifiable {
        case redeeming, redeemed, failed, idle
        var id: Self { self }
    }

    private(set) var isPro: Bool = false

    func subscriptionStatusDidChange(from oldValue: SubscriptionStatus, to newValue: SubscriptionStatus) {
        isPro = newValue.isActive
    }

    // Web Checkout

    func willRedeemLink() {
        withAnimation {
            self.webCheckoutStatus = .redeeming
        }
    }

    func didRedeemLink(result: RedemptionResult) {
        switch result {
        case .success(_, _):
            withAnimation { self.webCheckoutStatus = .redeemed }
        case .error(let code, let error):
            print("Error: \(code) - \(error.message)")
        case .expiredCode(let code, _):
            print("Expired code \(code)")
        case .invalidCode(let code):
            print("Invalid code: \(code)")
        case .expiredSubscription(let code, _):
            print("Expired \(code)")
        }
    }
}

import SuperwallKit

@main
struct Caffeine_PalApp: App {
    @State private var delegate: SWDelegate = .init()

    init() {
        Superwall.configure(apiKey: "YOUR_API_KEY")
        Superwall.shared.delegate = delegate
    }

    var body: some Scene {
        WindowGroup {
           YourView()
        }
    }
}
Wrapping up
Implementing app-to-web flows with Stripe checkout through Superwall essentially comes down to adding a Stripe product to an iOS paywall. The platform aims for developer ease and user comprehension in equal measure.
FAQ
- What do I need to set up web checkout in Superwall?
- Three steps: create a Stripe app in Superwall, configure it with your existing iOS app, and create the Stripe products you want to offer. Once done, you'll have a Stripe app alongside your iOS app in your Superwall project dashboard.
- How do I tell App Store products from Stripe products?
- App Store products are prepended with "app-store" and Stripe products are prefixed with "stripe-". Sandbox products include "test:" after the price, while production products display "live:".
- What's the difference between the two web checkout locations?
- In App Browser opens Stripe checkout in Safari within the app and dismisses when the transaction completes. External opens Safari outside the app, returning users to the app on completion (or immediately if universal links are configured).
- Which iOS SDK version is required, and how do I test it?
- You need iOS SDK version 4.3.4 or above. Add a sandbox product to an iOS paywall, run the app on a simulator or device, and use Stripe's test card number 4242 4242 4242 4242.
- How does my app know when a user has paid via web checkout?
- On completing a transaction, the Superwall delegate calls willRedeemLink and didRedeemLink(result:) for UI updates, and entitlements update through the subscriptionStatusDidChange delegate method to mark the user as a paying customer.